How to Whitelist Your RedM Server
Adding players to your RedM servers Allowlist, or whitelist, helps you control who can join, allowing only trusted players access. This helps prevent unwanted behavior like cheating or trolling and creates a better, more enjoyable experience for your community. Whitelist management can be handled directly through the Nodecraft control panel or through txAdmin, making it easy to approve or deny players before they can connect. Setting it up takes just a few steps, so let’s get started!
Note: Be sure that your RedM server is fully stopped before making any configuration changes or setting updates!
Using the Control Panel
Log in to your Nodecraft Control Panel.
Navigate to the Allowlist / Whitelist tab on the left-side toolbar.
Toggle on or off the Enable Allowlist/Whitelist option to control the server's whitelist.
To add players to your whitelist, select the green plus icon within the Allowed Users section.
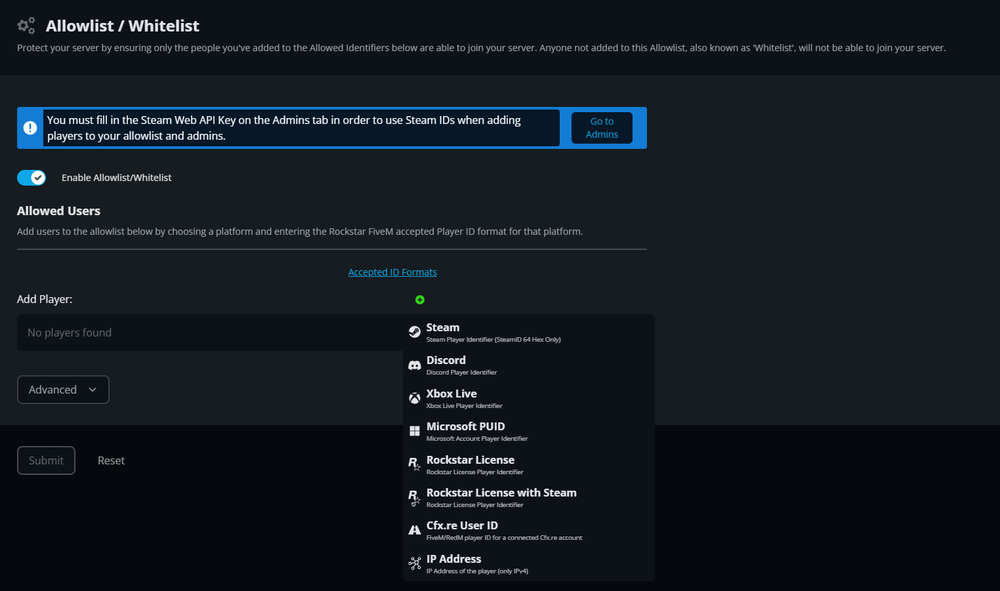
Select the Identifier type you would like to use and enter their Identifier into the available box.
Click Submit to save your changes.
To edit server messages regarding the whitelist, you can click on the Advanced button to expand the available settings. Within this section, you can edit the Denied Message, Checking Message, and Progress Message. Be sure to save after any updates!
Using txAdmin
Log in to your Nodecraft Control Panel.
Locate the txAdmin Info panel available on the Overview tab.
Copy the IP address and log in to your txAdmin account.

Enable Whitelist Mode
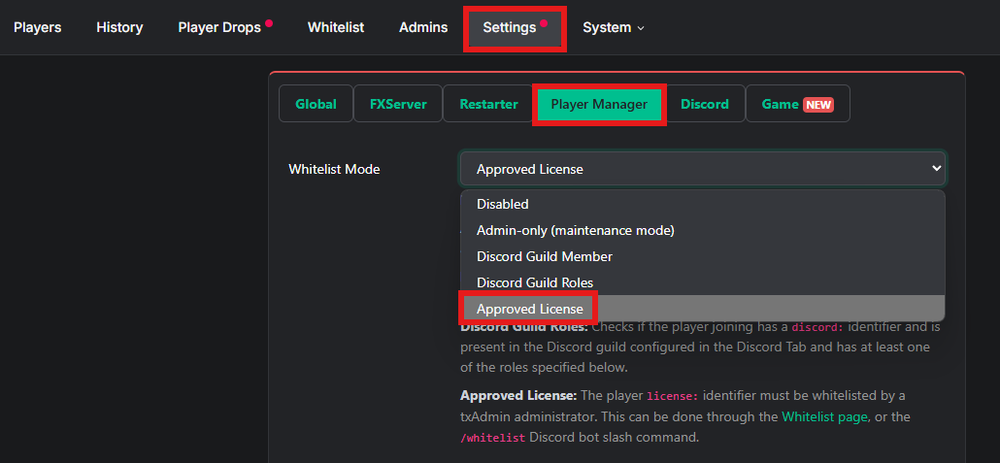
In txAdmin, go to the Settings tab.
Navigate to the Player Manager section.
Under Whitelist Mode, select Approved License from the dropdown menu.
Customize your Whitelist Rejection Message (optional).
Click Save Player Manager Settings.

Approving Players
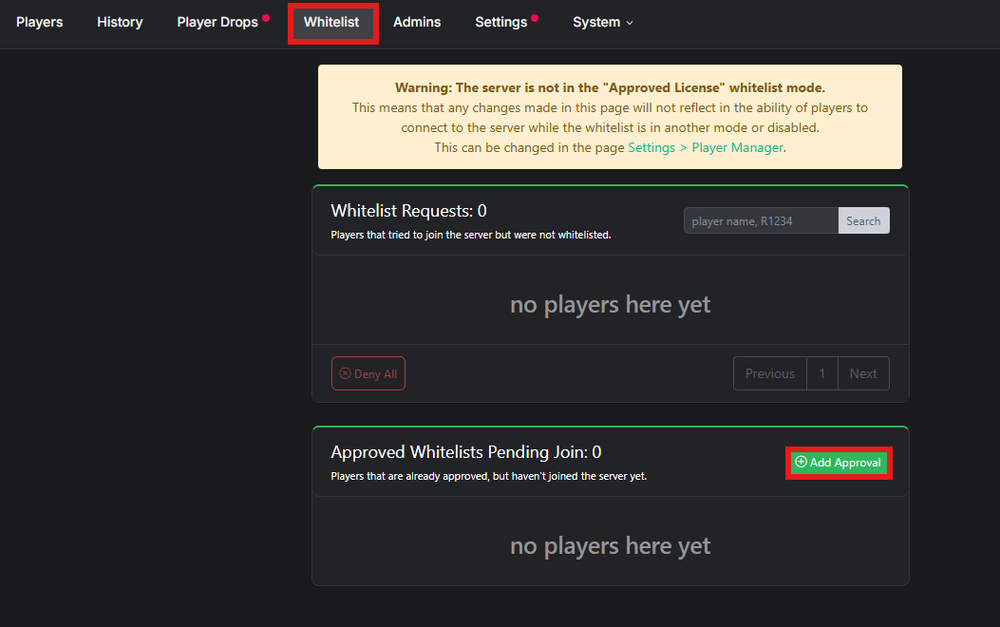
Go to the Whitelist tab.
Under Whitelist Requests, approve or deny pending players.
In the Approved Whitelist Pending Join section, click Add Approval.
Enter the player's identifier using the format:
identifierType:identifier.Note: If using a SteamID64, you must have a Steam Web API Key enabled. Check out this guide if you need help with this!
Click Submit to finalize the whitelist process.

Conclusion
Whitelisting your RedM server helps keep your community secure and well-managed. With txAdmin, adding and approving players is quick and easy, giving you full control over who can join. Now that your whitelist is set up, you can focus on creating the best experience for your players.
Need Help?
If you have questions or run into any issues, our support team is here to help! Reach out using the support widget on our website or visit our support center for further assistance.