How to Install Forge on Your Minecraft Server
If you want to use a custom list of mods on your Minecraft server, installing Forge is the first step. Forge is a modloader that makes it possible to add custom content to your game, from new blocks and items to entirely new mechanics. In this guide, we’ll walk you through the full installation process, from downloading the correct version to getting it set up and ready to use.
Using the One-Click Installer
Navigate to your Nodecraft Dashboard.
Click the Panel button for your Minecraft server.
Locate and click Installer, under Server Files, in the menu on the left side.
Enter Forge in the Search box. The results will update automatically as you type. This is the modpack you’re looking for:

In the Selected to be Installed box, choose the desired version of Forge you want to install.
For the Install Method, choose between Archive and Fresh Install, then click Install at the bottom.
Once the installation is complete, start your server.
After the server has been started the first time, you’ll have a mods folder where you can upload mods for your server to run.
Manually Uploading the Files
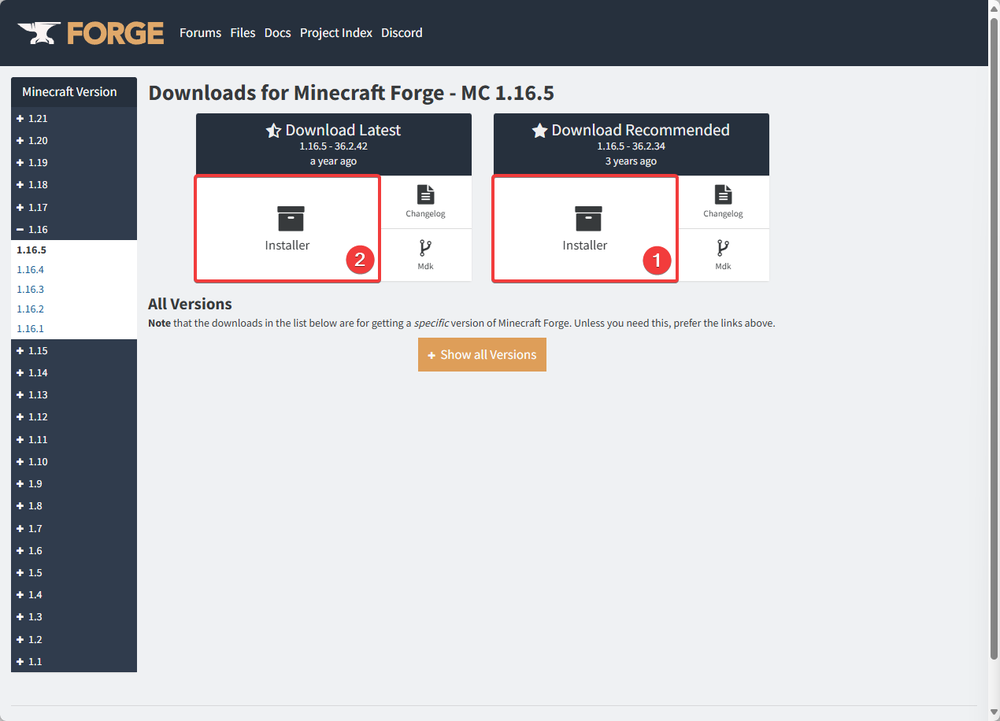
Navigate to https://files.minecraftforge.net/net/minecraftforge/forge/
Minecraft mod releases are specific to Minecraft versions, so find the Minecraft version you’re targeting in the list on the left side.
Download the recommended installer for the version you’ve selected (1). If a recommended download is not available, download the latest (2).
Save the JAR file and run it to open the Forge installer.
Select Install Server (1) then choose an empty folder somewhere you can easily access (2), such as your desktop or Downloads folder, then hit OK (3).

The installer will begin downloading and installing the necessary files to run a Forge server in the folder you specified.
Navigate to your Nodecraft Dashboard.
Click the Panel button for your Minecraft server.
Locate and click Server Files in the menu on the left side.
Click Upload at the top, then drag the Forge files from your computer into the server.
Note: Wait until the upload is complete before closing the popup.
Once uploaded, click Server Settings on the left side, then click the Java tab.
Under Server Jar, select the Forge jar that you just uploaded.
Scroll down to the bottom of the page and click Submit to save your changes.
Start the server, and now you have Forge installed!
Need Help?
If you have questions or run into any issues, our support team is here to help! Reach out using the support widget on our website or visit our support center for further assistance.