Using the Valguero DLC Map on Your ARK: Survival Evolved Server
This guide will show you how to install the free DLC map "Valguero", on both your client and your server.
Installing the DLC Map on Your Client
"Valguero" is a DLC map, which means it is not provided along with the basegame files for ARK: Survival Evolved. It must be downloaded separately and installed on your client, in order for a player to connect to a server running the Valguero map. The Valguero map is a FREE download.
The map is offered in the DLC section, along with other game expansions (such as Genesis Part 1, Extinction, Aberration, Etc).
To Install the DLC Map
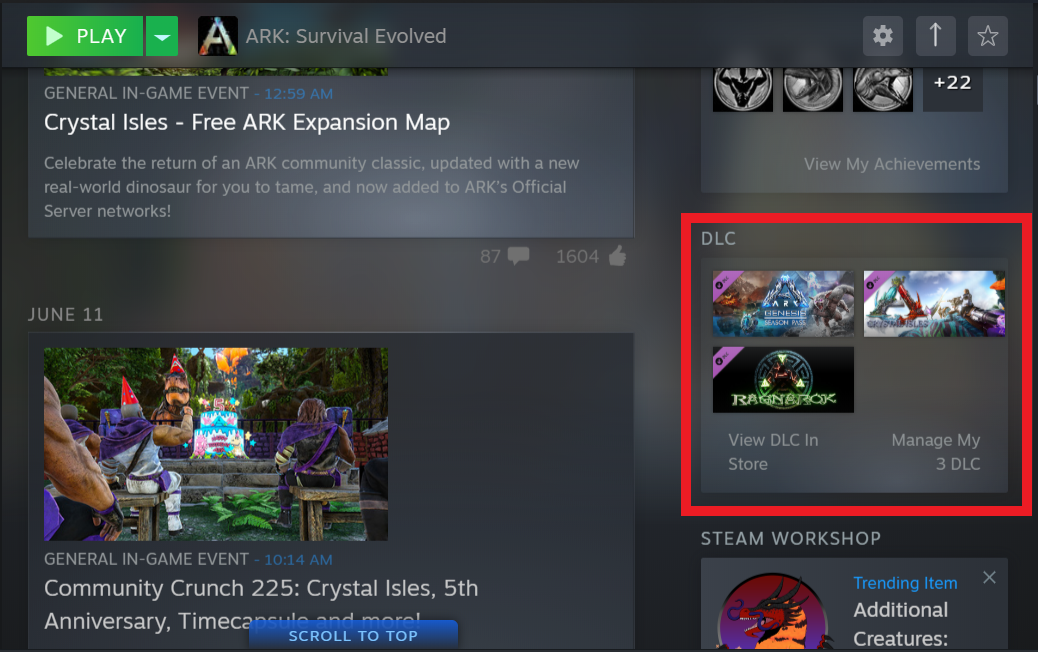
Click on ARK: Survival Evolved in your game library. Scroll down the main page until you see the DLC section in a small box on the right side. Click on "View DLC in Store". 
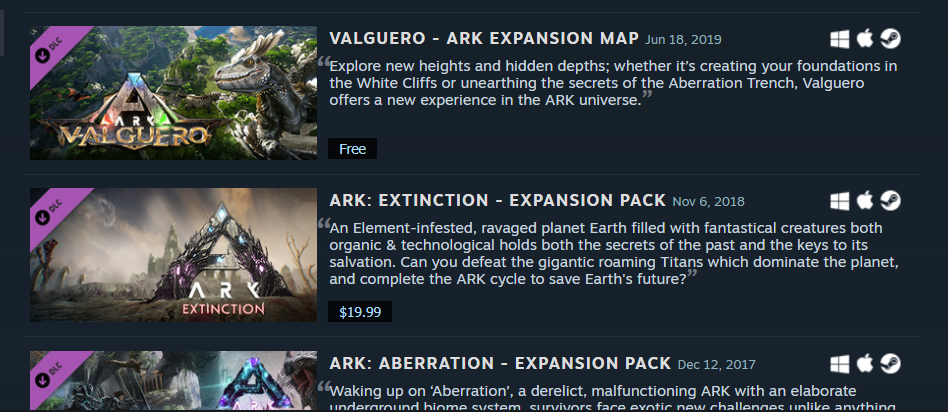
When the DLC page opens, scroll down until you see the section that looks like the screenshot below. Click on the Valguero - ARK Expansion Map in the list.

When the page for Valguero loads, scroll down a bit until you see the "Free Download" button, and click on it (like the screenshot below). 
When you click on the button, it will launch the game and begin downloading the expansion map. The Valguero map is large one, so it might take a bit to download completely. Once it's finished, you have the expansion map on your client, and now you can connect to any server running the "Valguero" expansion map.
Setting the Valguero Map on Your Server
On the Nodecraft control panel, Valguero is available for use on all ARK servers. Click on the Game Settings section, and make sure the "Basic" section is selected. In the "Map" box, click on the downward pointing triangle at the far right end of the map box. This opens a dropdown menu which lists maps for ARK: Survival Evolved. Simply select "Valguero" from that list and click on it.

Save your changes at the bottom of the Game Settings section, and then the last thing is to just restart the server. When the server restarts, it will create a Valguero map on your server!
Need Help?
If you have questions or run into any issues, our support team is here to help! Reach out using the support widget on our website or visit our support center for further assistance.