How to Update Individual Mods on a Minecraft Server
In this guide we are going to cover how you can update a single mod on your minecraft server. This can be done on a pre-made modpack or a modpack that you initially made yourself. When you update a mod, it generally will need to be updated on both your server and client, or you could encounter problems. Before proceeding it’s recommended to have a backup.
Updating a Mod
Note: Before continuing, please ensure that your Minecraft server is fully offline!
Download the latest/updated version of the modpack you want to update.
Open your dashboard then open the panel for your minecraft server.
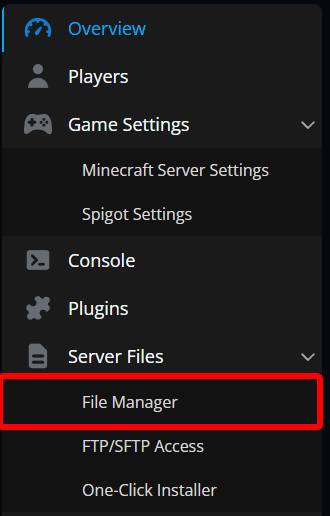
Once on your panel, stop the server then open the File Manager from your sidebar.
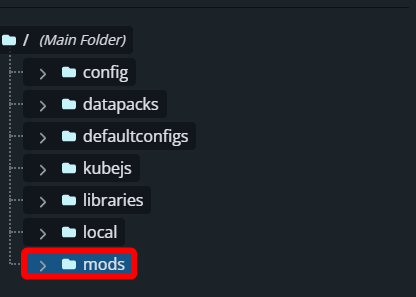
Navigate to the mods folder.
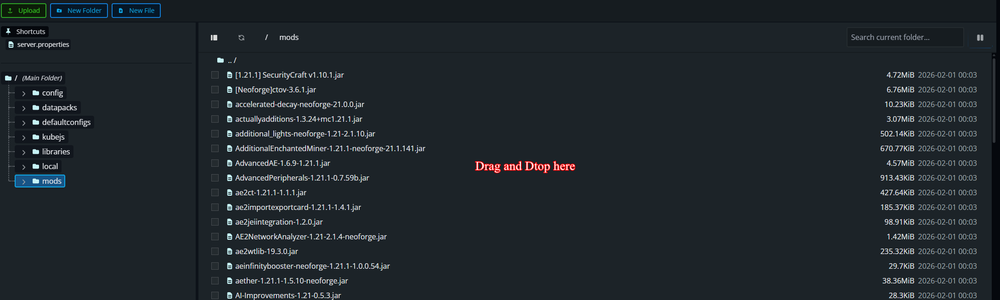
Once the mods folder is open, find the mod that you are updating, select it, then click delete.

Once the mod is deleted you can drag and drop the updated mod that you downloaded into the same folder to upload it. Once uploaded you can start your server.
Conclusion
Updating a single mod is a straightforward process once you know where the files live. By stopping the server, replacing the outdated mod inside the mods folder, and uploading the updated version, you can keep your modpack current without disrupting everything else.
Always make sure the same mod version is installed on both the server and client, since mismatched files are one of the most common causes of crashes and connection issues. Keeping backups before changes gives you a safe fallback if something doesn’t load correctly. With the updated file in place and the server restarted, your modpack is ready to run with the latest changes applied!
Need Help?
If you have questions or run into any issues, our support team is here to help! Reach out using the support widget on our website or visit our support center for further assistance.