How to Add Admins to Your CS2 Server
Adding admins to your Counter-Strike 2 dedicated server allows you to assign moderation and management privileges to trusted players. To do this, you'll first need to install a plugin framework like CounterStrikeSharp, as CS2 does not offer built-in admin tools by default. Once the framework is in place, you can configure admin permissions through a plugin's settings, ensuring your server is properly managed and maintained.
Note: Be sure that your Counter Strike 2 server is fully stopped before making any configuration changes or setting updates!
Install Metamod and CounterStrikeSharp
You will need to ensure that your server has both Metamod and CounterStrikeSharp installed to your server to add admins to it. We have a guide on how to add admins HERE.
Adding Admins
Adding an Admin is as simple as creating a new entry in the admins.json file. The important things you need to define are the SteamID identifier and the permissions they have.
Navigate to your Counter Strike 2 servers’ dashboard.
Locate and click the Server Files option on the left side of your dashboard.
Navigate to the
/game/csgo/addons/counterstrikesharp/configsfolder.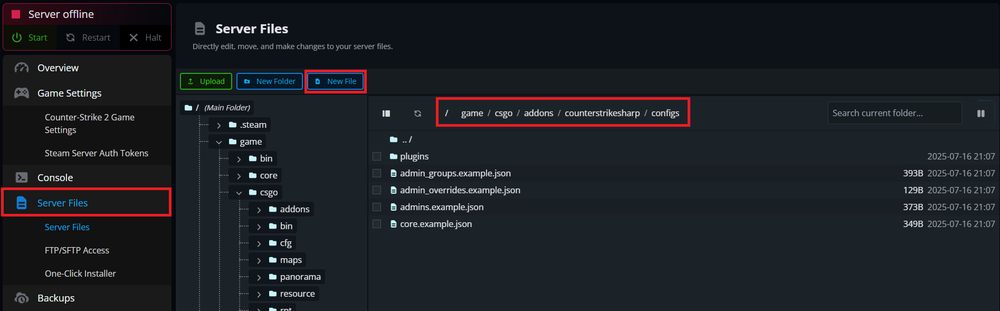
Select and Edit the
admins.jsonfile, if you don't see one, you can create that file ahead of time by clicking the New File button.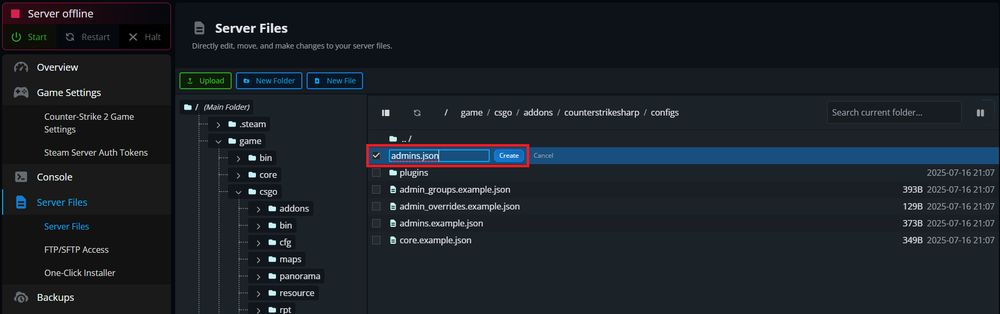
Add each player to the file, making sure to define their SteamID to the identity setting, and the permissions (flags) that they are allowed to use.
Click the Save Changes button when you're done editing.
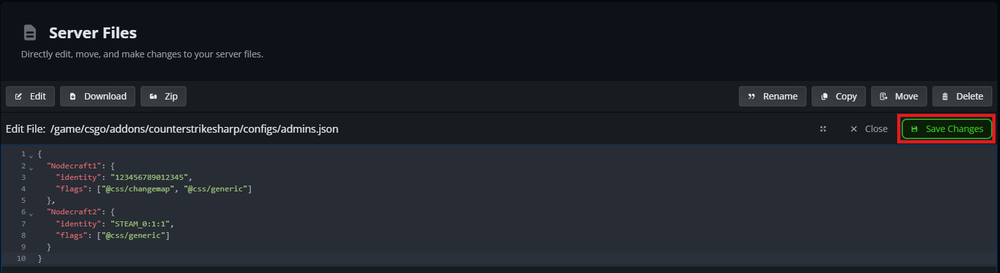
An example of this can be found below.
{
  "Nodecraft1": {
    "identity": "12345678901234",
    "flags": ["@css/changemap", "@css/generic"]
  },
  "Nodecraft2": {
    "identity": "STEAM_0:1:1",
    "flags": ["@css/generic"]
  }
}
Adding Admin Groups
Groups can be created to group a series of permissions under one tag. They are defined in /game/csgo/addons/counterstrikesharp/configs/admin_groups.json. The important things you need to declare are the name of the group and the permissions they have.
"#css/simple-admin": {
  "flags": [
    "@css/generic",
    "@css/reservation",
    "@css/ban",
    "@css/slay",
  ]
}
You can add an admin to a group using the groups array in admins.json.
{
  "Nodecraft1": {
    "identity": "12345678901234",
    "flags": ["@mycustomplugin/admin"],
    "groups": ["#css/simple-admin"]
  },
  "Nodecraft2": {
    "identity": "STEAM_0:1:1",
    "flags": ["@mycustomplugin/admin"],
    "groups": ["#css/simple-admin"]
  }
}
When creating groups, all group names MUST start with a hashtag # character, otherwise CounterStrikeSharp won't recognize the group.
Adding Admin Immunity
Admins can be assigned an immunity value, similar to SourceMod. If an admin or player with a lower immunity value targets another admin or player with a larger immunity value, then the command will fail. You can define an immunity value by adding the immunity key to each admin in admins.json.
{
  "Nodecraft": {
    "identity": "12345678901234",
    "flags": ["@css/changemap", "@css/generic"],
    "immunity": 100
  }
}
You can even assign an immunity value to groups in the admin_groups.json. If an admin has a lower immunity value, the group's value will be used instead.
"#css/simple-admin": {
  "flags": [
    "@css/generic",
    "@css/reservation",
    "@css/ban",
    "@css/slay",
  ],
  "immunity": 100
}
Flags/Permissions
CounterStrikeSharp does not implement traditional admin commands like
!slay,!kick, and!ban. It is up to individual plugins that you add later to implement these commands.
Because the flag system is just a list of strings associated with a user, there is no real list of letter-based flags like there was previously in something like SourceMod. This means a plugin author can declare their own flags, like @Nodecraft1/guns, which might be the permission to allow the spawning of guns as a command.
It is recommended that you read over all documentation an administrative-type plugin provides to know how the plugin author has configured the flags for commands.
Conclusion
With admin access configured using CounterStrikeSharp or a similar plugin framework, your Counter-Strike 2 server is now better equipped to handle in-game moderation, enforce rules, and maintain a positive player environment. Make sure to assign admin permissions carefully and regularly update your plugin setup to keep your server secure and running smoothly.
Need Help?
If you have questions or run into any issues, our support team is here to help! Reach out using the support widget on our website or visit our support center for further assistance.