How to Update Your RedM Server
Keeping your RedM server updated is key to maintaining stability, improving performance, and gaining access to the latest features. Regular updates help prevent issues, keep your server running smoothly, and ensure compatibility with new game versions. Updating your server is a quick and straightforward process, and this guide will walk you through the steps using the Nodecraft control panel.
Updating your Server
Note: Be sure that your RedM server is fully stopped before making any configuration changes or performing updates!
Log in to your Nodecraft Control Panel.
Navigate to the One-Click Installer.
Click on Change Version.

Selected your desired Version.
Choose your preferred installation method:
Update: This is the preferred and default method for RedM, and will result in your
FXServerbeing updated, but all other files remaining intact. We recommend this method the majority of cases.Fresh Install: Replaced all existing files with new one, wiping all prior server files. This cannot be undone.
Archive Install: Creates a folder named
_old_files, allowing you to manually move specific folders from_old_filesback to the main directory. We only recommend this option if you're an advanced user.
Note for Archive Installing: If you do not use our smart "Update" installation method, and choose to manually do an "Archive" install, you will need to move some files/folders around manually. Move the following folders from the
_old_filesfolder to the main directory:resources,nodecraft_config.cfg, andserver.cfg.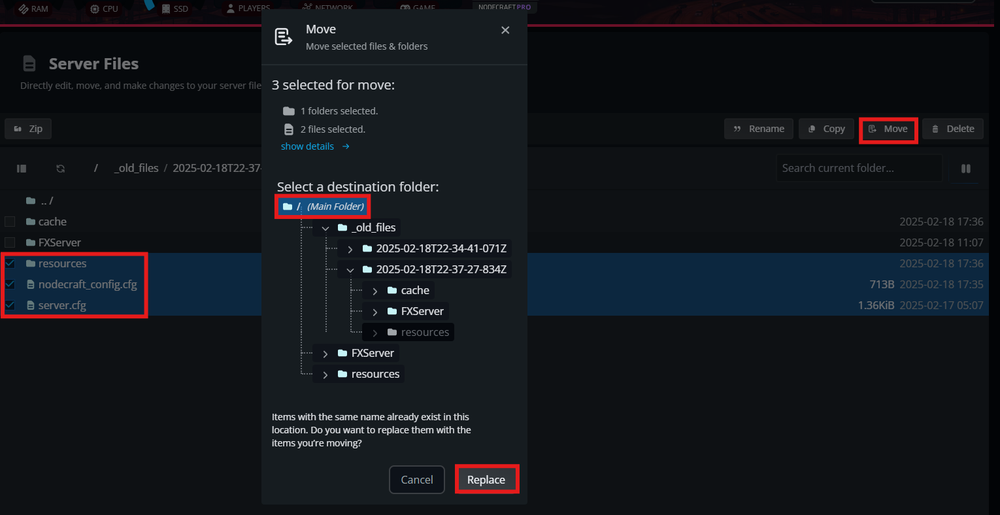 You will need to perform these moves to complete the Archive Install. This will retain your previous progress and settings.
Click Install to proceed with the update.
Once the installation is completed, Start your server.
Conclusion:
With your RedM server now updated, you're set to enjoy the newest bug fixes and the latest features. Staying on top of updates also helps keep everything running smoothly and minimizes potential issues down the road.
Need Help?
If you have questions or run into any issues, our support team is here to help! Reach out using the support widget on our website or visit our support center for further assistance.