


How to Become Admin on Your 7 Days to Die Server

In this article, we'll show you how to make you or any other player an admin on your 7 Days to Die server, regardless of the platform they're playing on!
Note: Be sure that your 7 Days to Die server is fully stopped before making any configuration changes or setting updates!
Adding an Admin through the Console
You'll need to log onto the server for this step, but it'll work on all platforms!
Navigate to your Nodecraft Dashboard.
Click the Panel button for your 7 Days to Die server.
Start your server if it is not already started.
Open the Console section of your panel.
Have the account you wish to give admin join the server in-game. Make sure you spawn in!
Type the command
lpiin the console. This will list all players on the server and their ID. We are looking for everything after the id=. In the screenshot below, we'd be looking for the number171.
Now that you have the ID of the player you wish to give admin, you'd type the following command:
admin add IDHERE 0
Adding an Admin manually (Advanced)
For this section, you'll want to know your Steam64 ID. If you don't know how to find your Steam64 ID, we have a separate guide that shows you how to find out. See this article for information.
Navigate to your Nodecraft Dashboard.
Click the Panel button for your 7 Days to Die server.
Stop your server.
Expand the Server Files on the left sidebar, then click the File Manager section.
In the top left of the File Manager, click the Permissions shortcut.
If you don't see the shortcut, you will need to start then stop the server at least once.
Find the
<users>section. It should be directly below the<adminTools>section.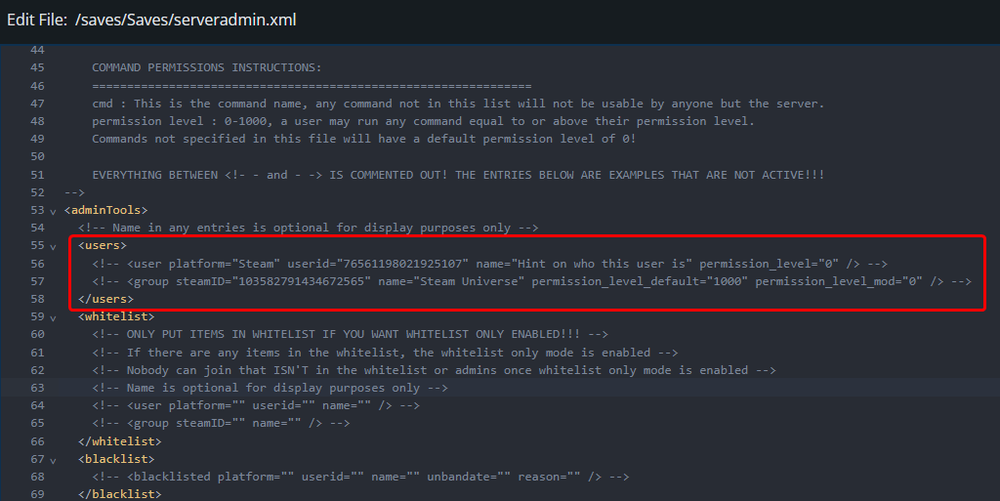
In the
userid=section, add your SteamID64 and remove the<--comments.Click the Save button in the top right.
Start your server.
Conclusion
You should now be able to set admins in 7D2D by either the console or the file manually, granting access to admin commands of any players of your choosing.
Need Help?
If you have questions or run into any issues, our support team is here to help! Reach out using the support widget on our website or visit our support center for further assistance.